Requests & Notifications
User guideLast updated September 1, 2026
When you're signed in, your control panel is where you track everything you've booked. The menu on the left has three items: Requests, Notifications, and Calendar. The red badge on Requests shows the number of new requests, and the badge on Notifications shows the number of new changes. Calendar opens the public calendar, so you can see what's already booked (see the ‘Browsing the Calendar’ guide). The New Booking button at the bottom-left starts a new request (see the ‘Submitting a Booking Request’ guide).
Requests
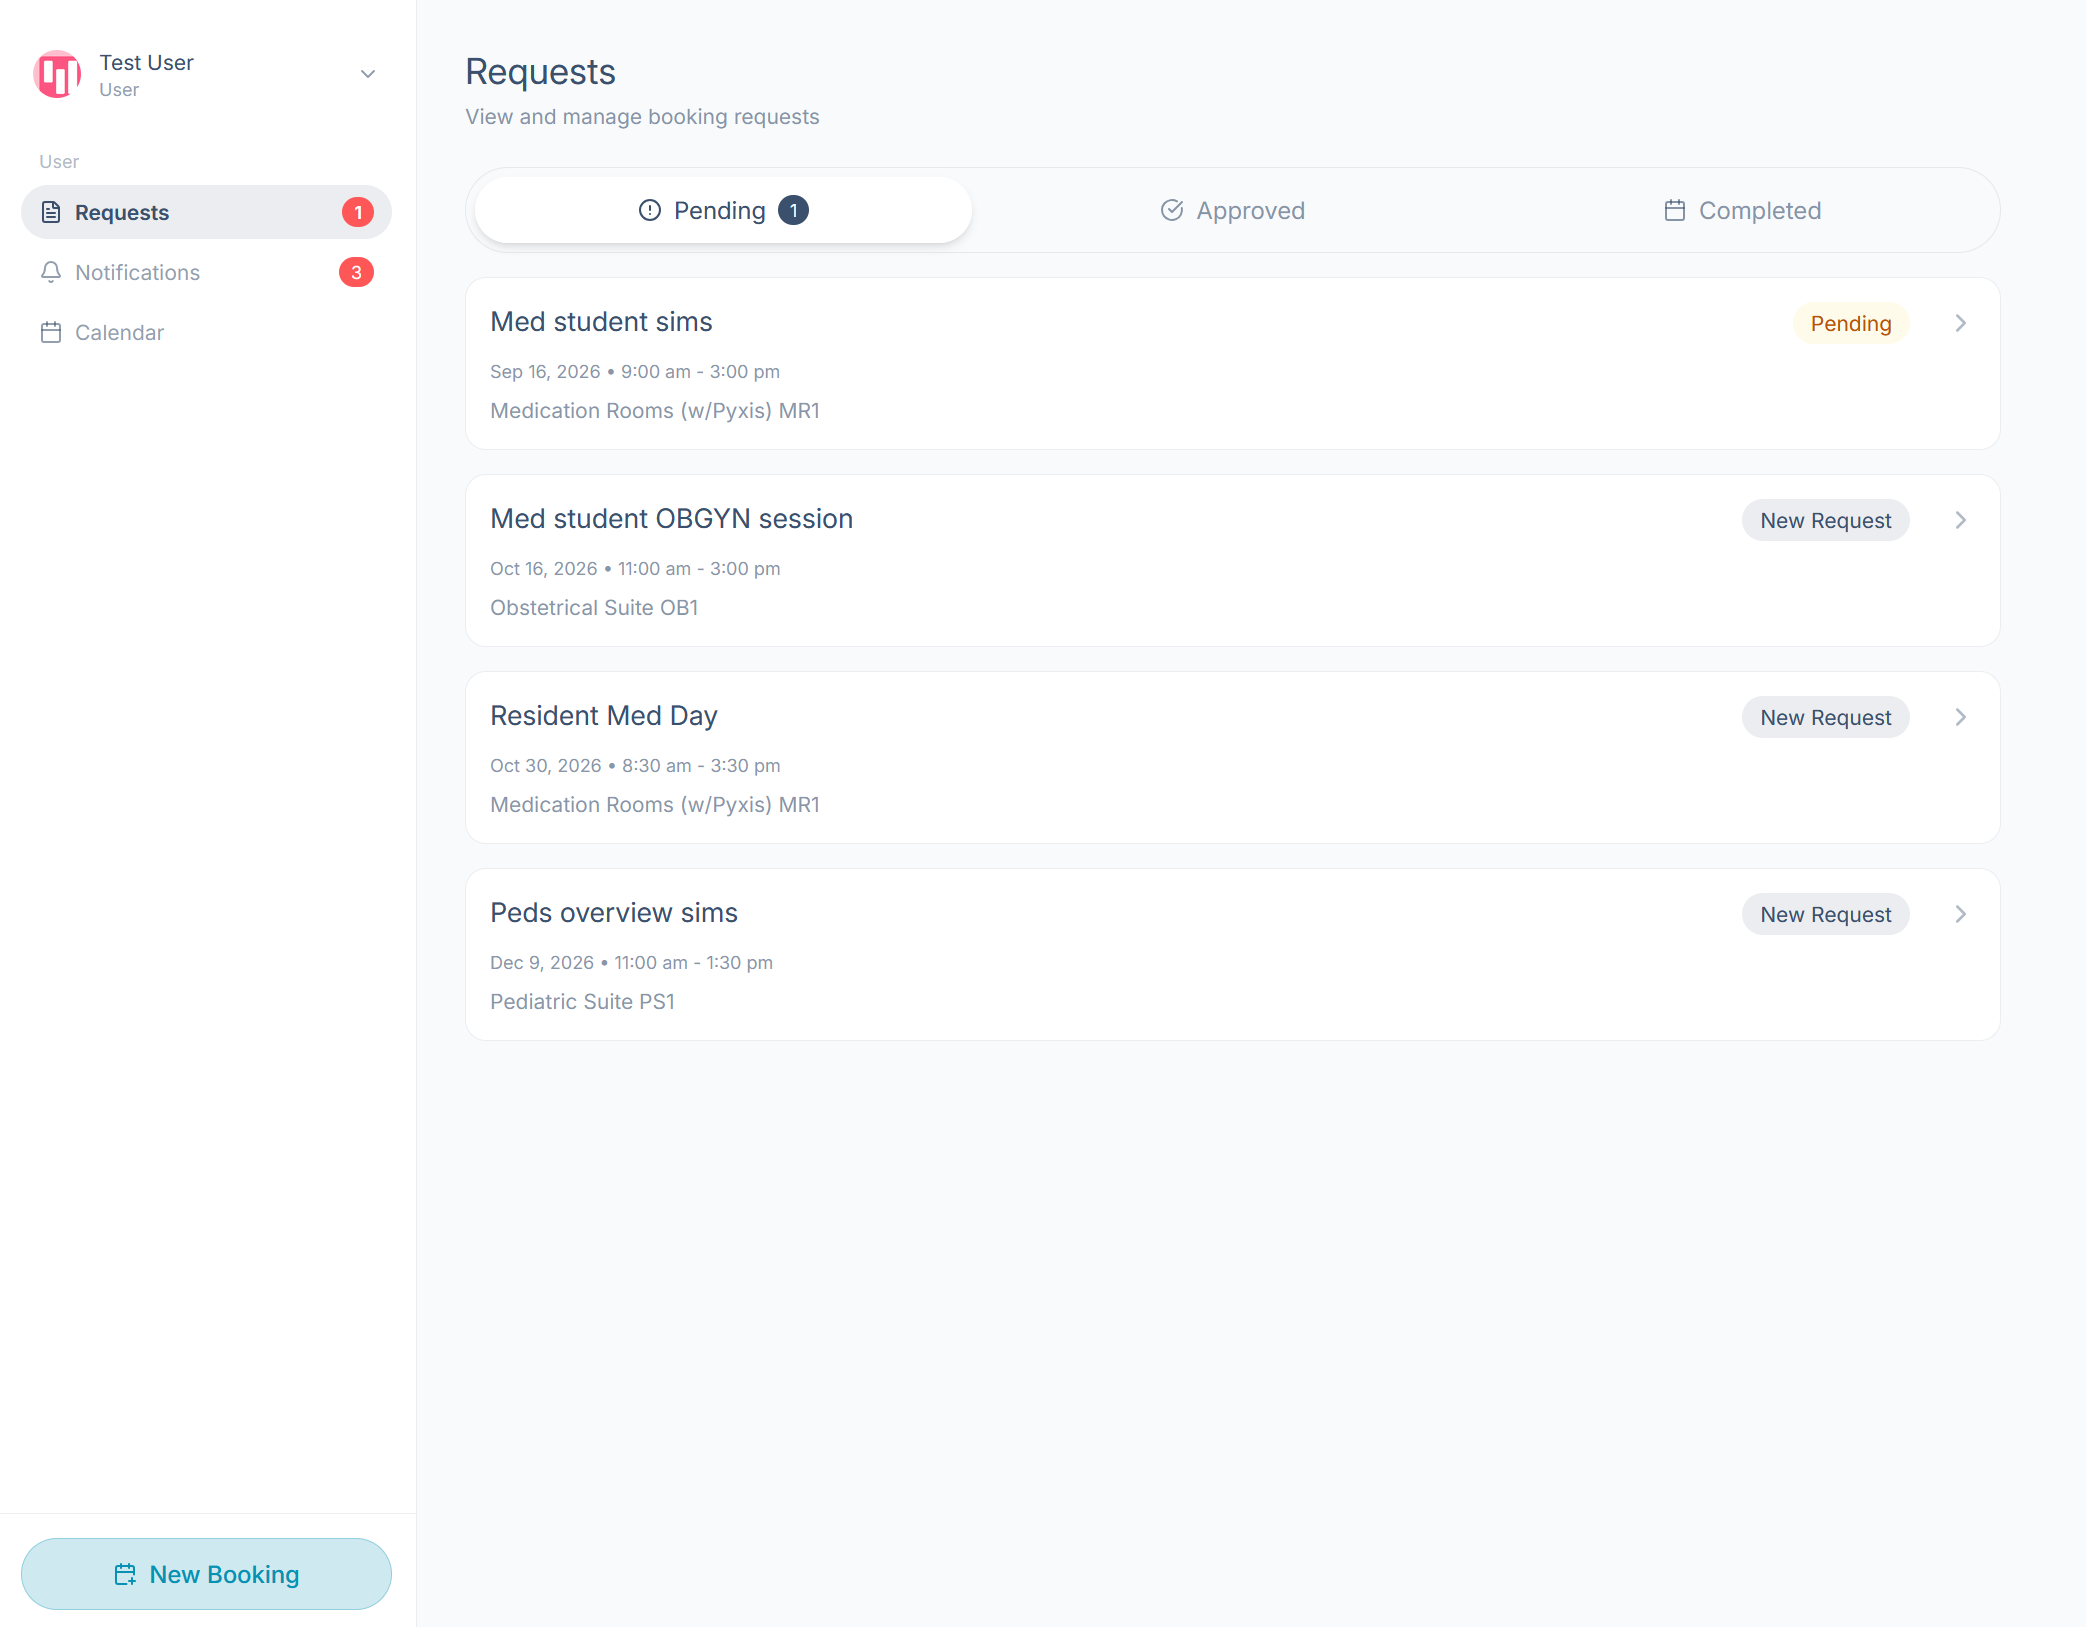
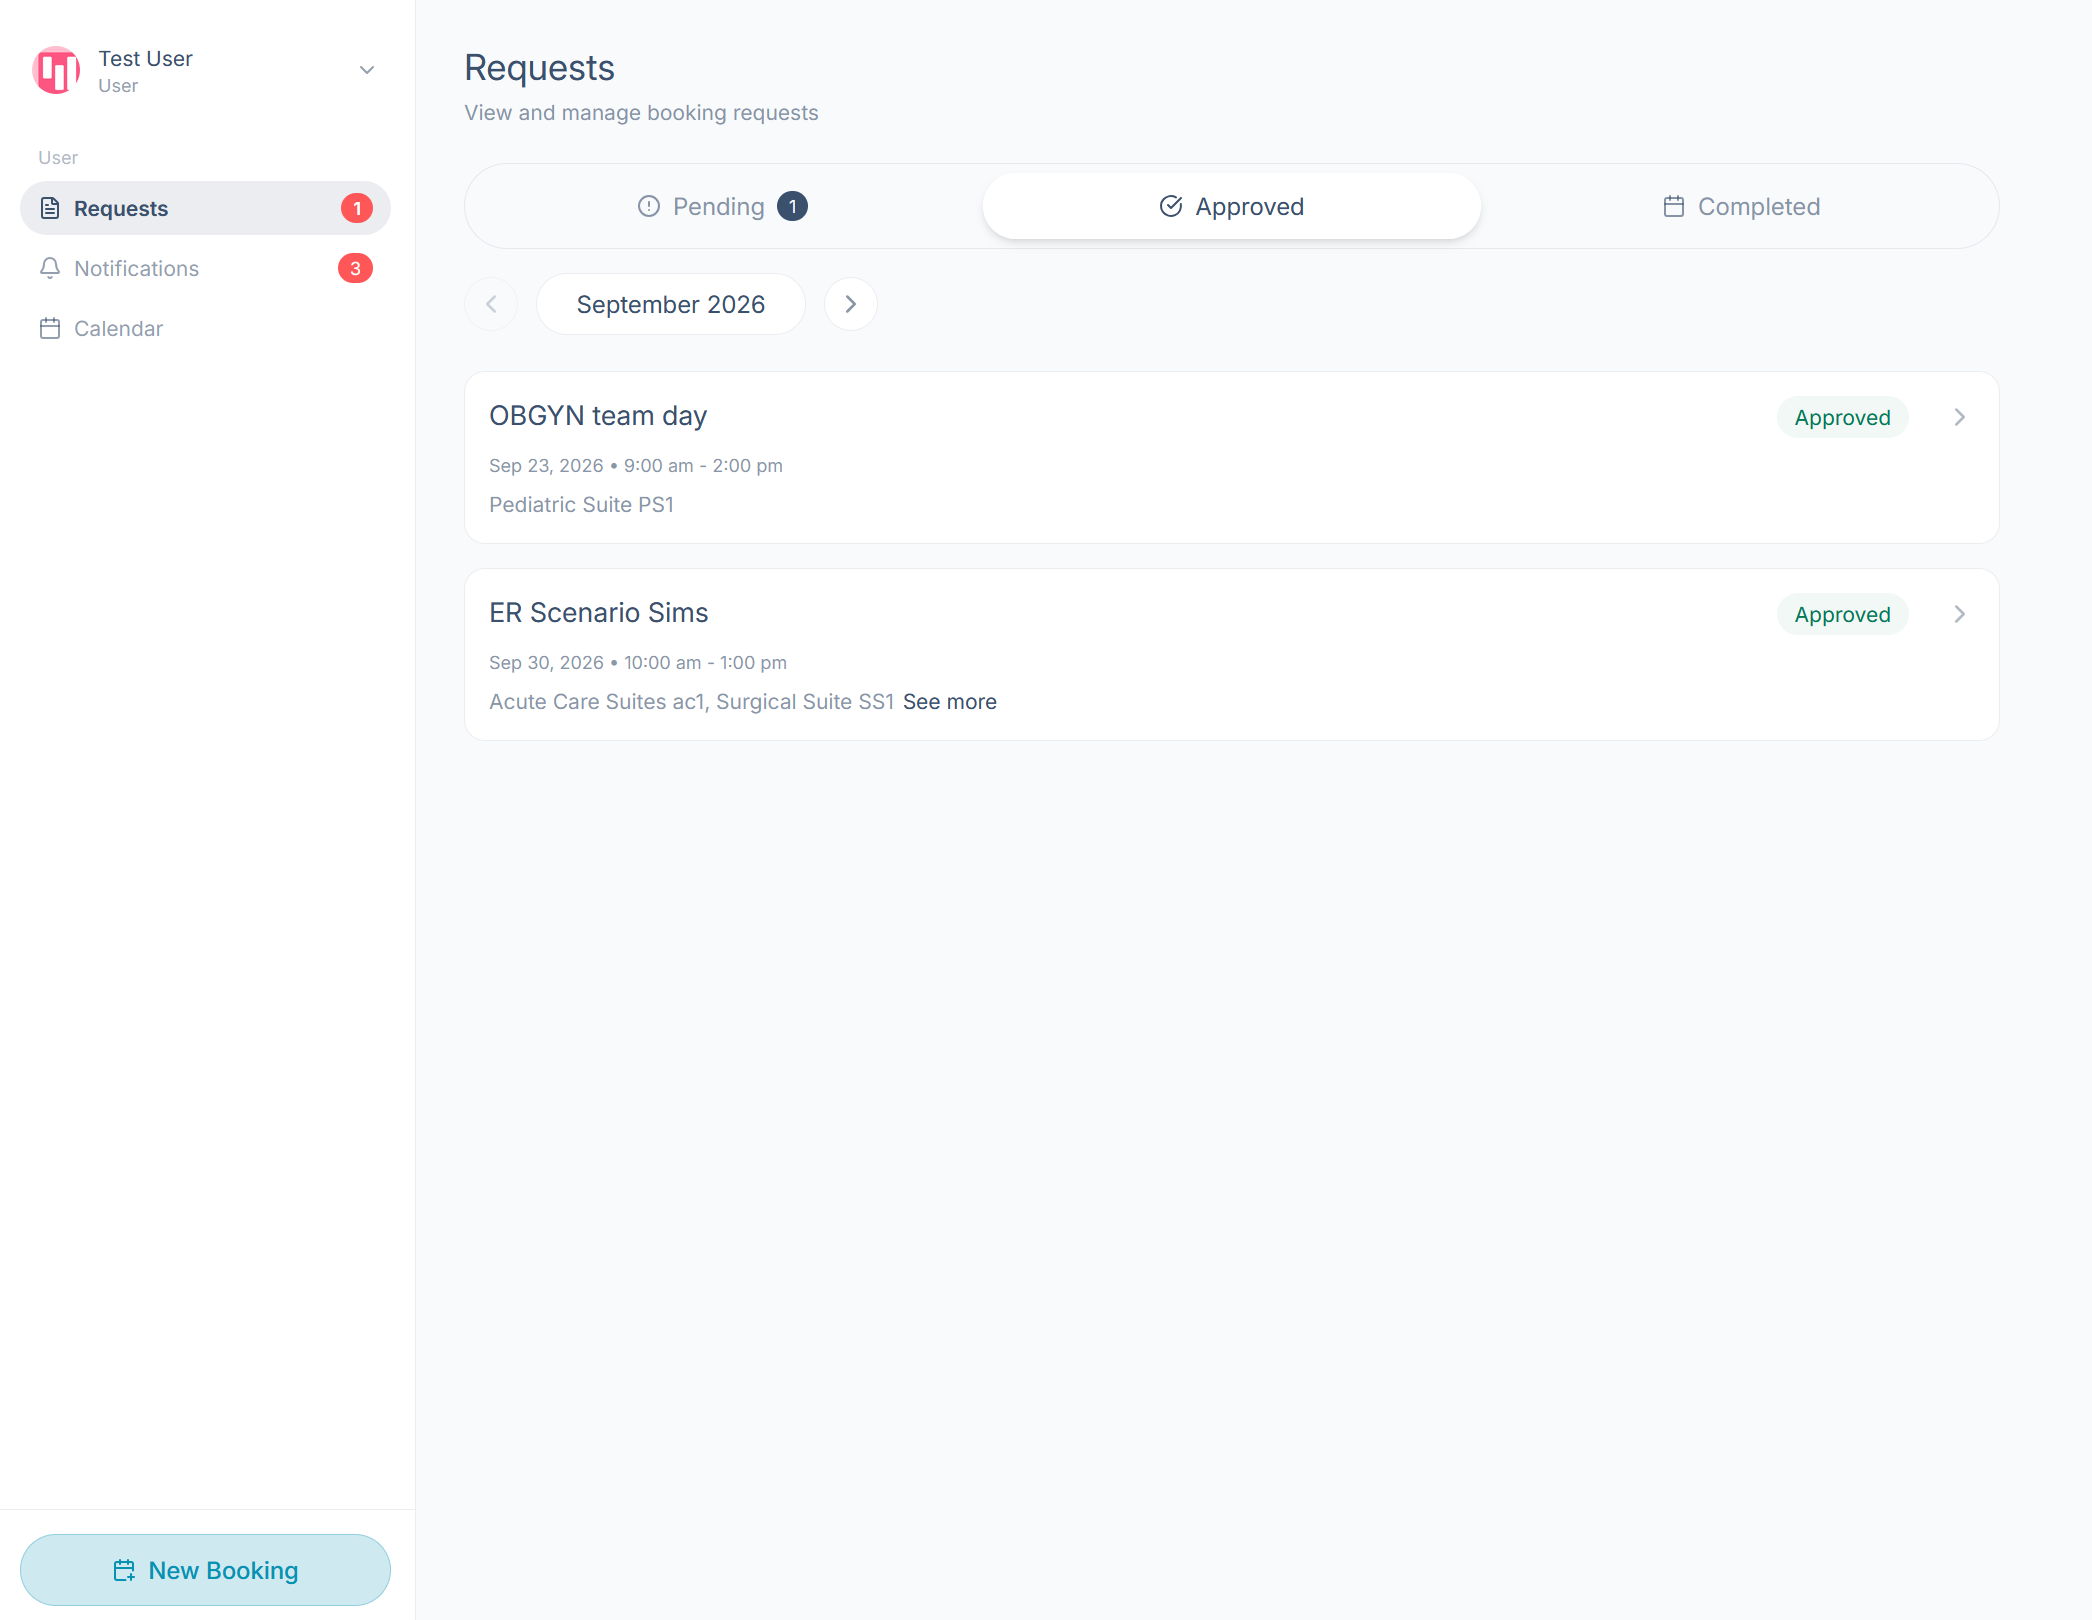
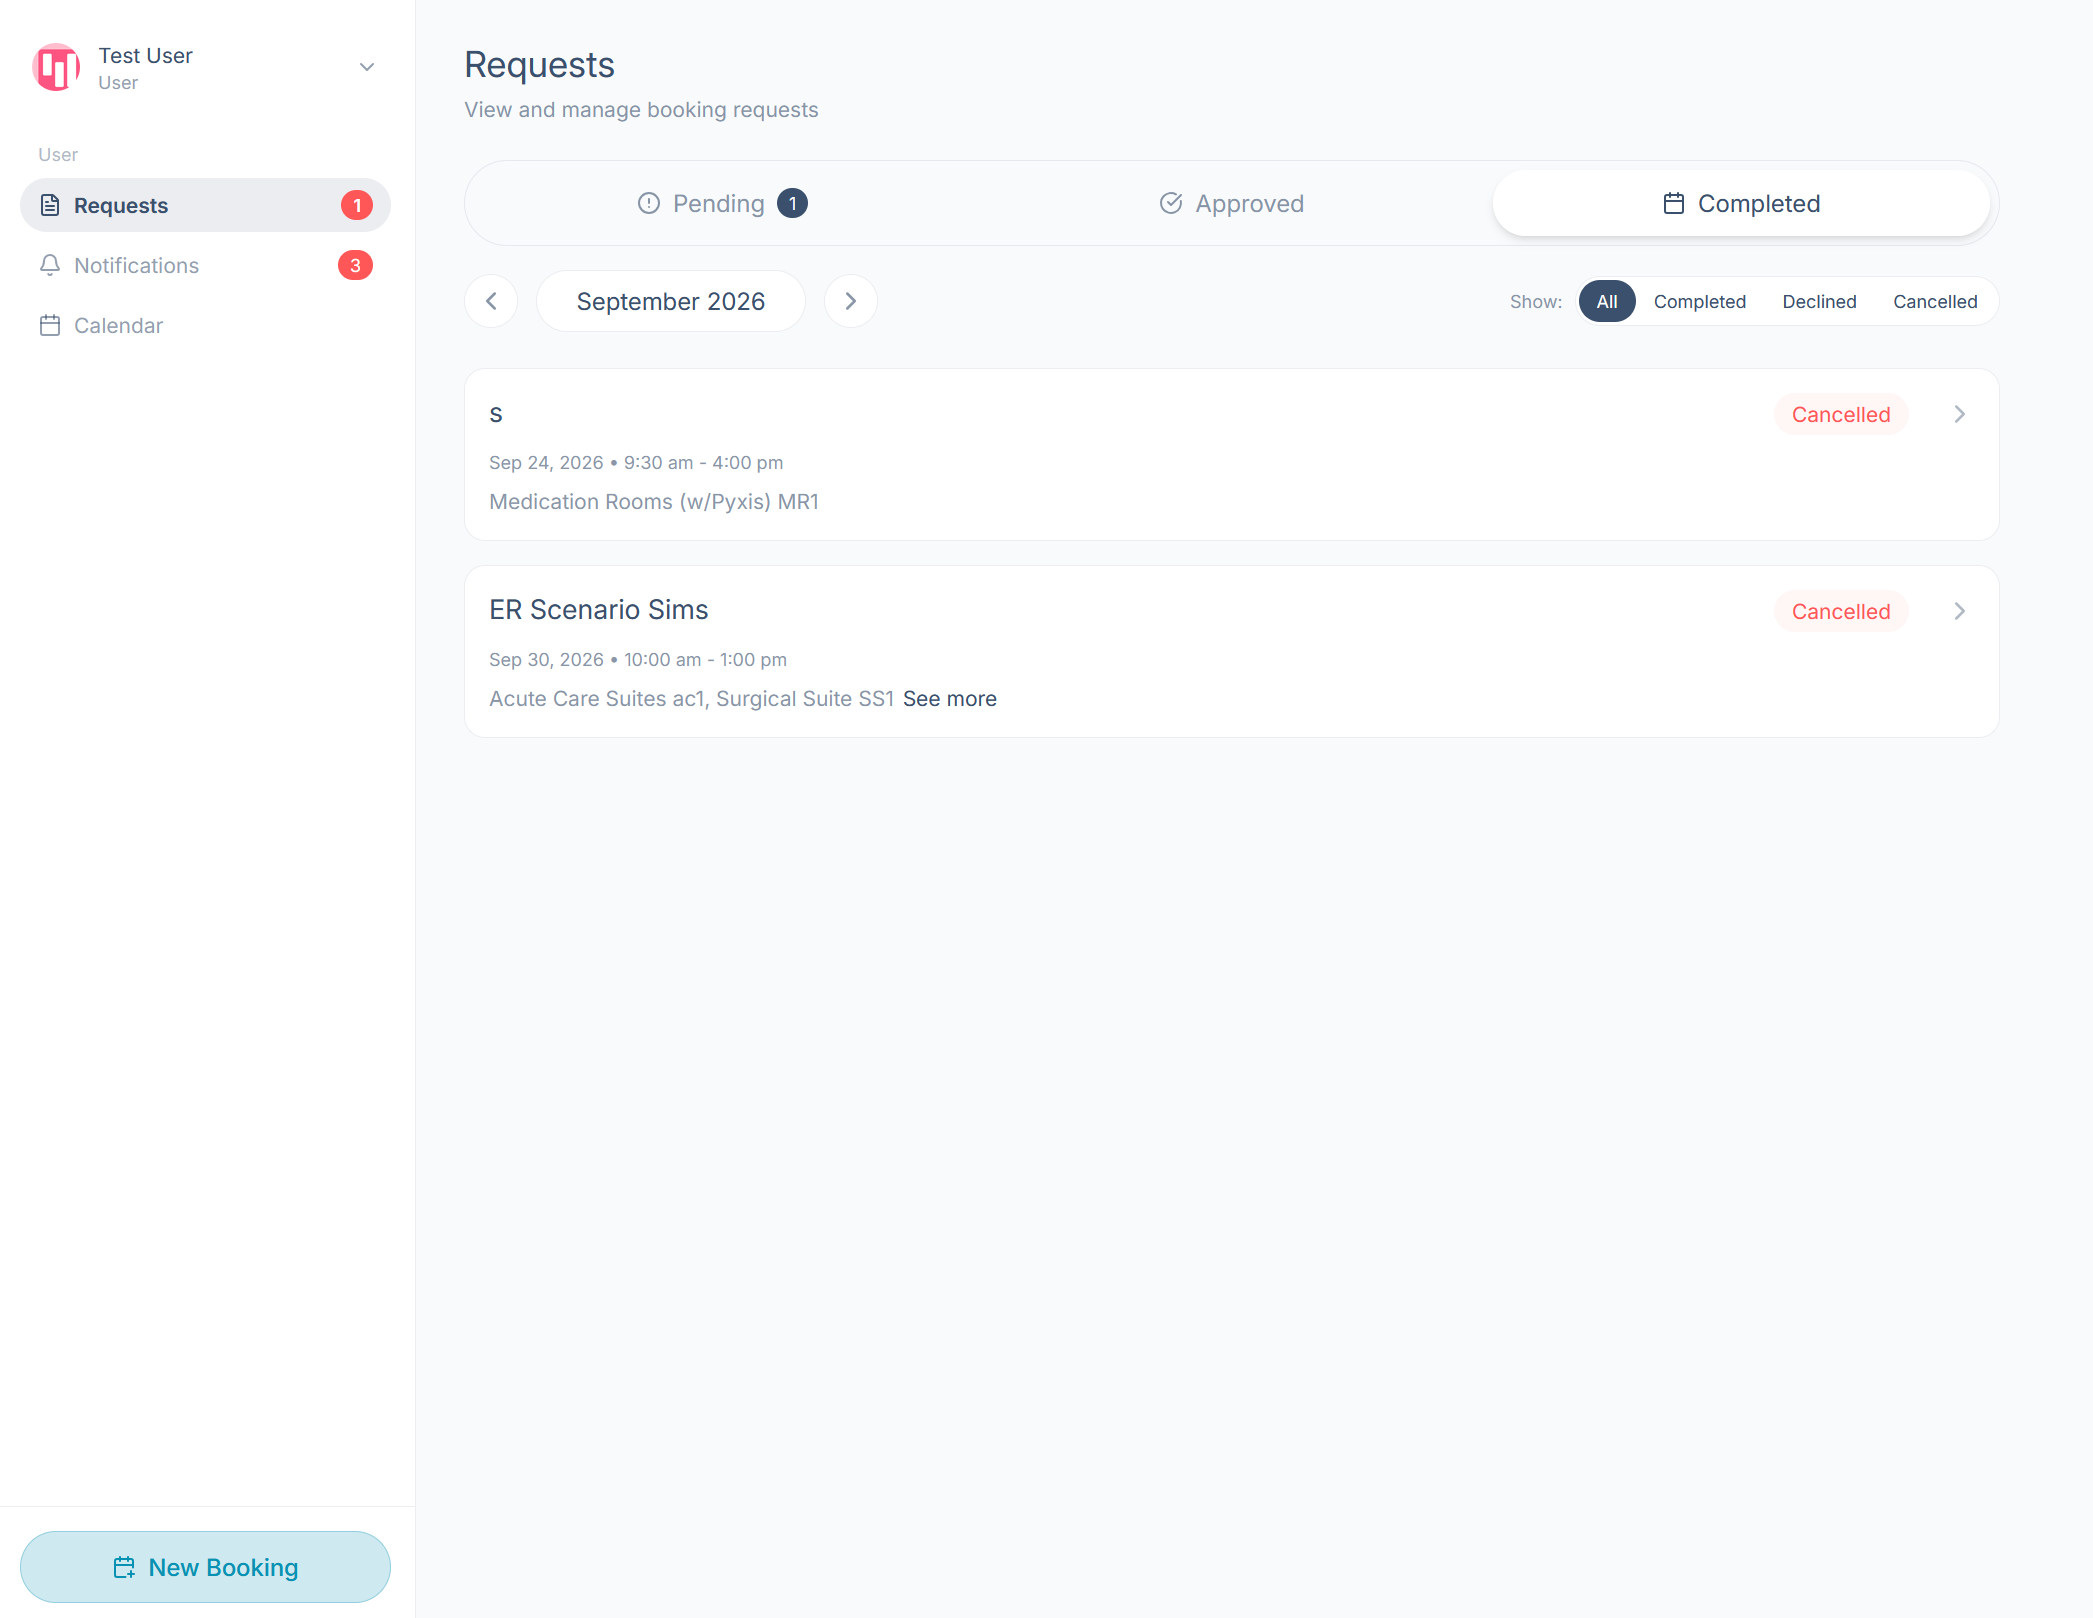
Requests lists every booking request you've made, grouped into three tabs. Pending holds everything not yet approved, Approved holds confirmed bookings, and Completed holds your Completed, Declined, and Cancelled items. Select a tab to switch views, and select any request card to open its full details.
The Pending tab mixes two statuses, so read the badge on each card: New Request means your center hasn't reviewed it yet, and Pending means they have reviewed it but haven't approved it yet.
What the statuses mean
- New Request: Submitted, but your center hasn't reviewed it yet.
- Pending: Your center has seen the request and it's awaiting a decision. Requests often stay pending because your center is waiting for more information from you, so check the activity history for messages.
- Approved: Confirmed. Your session is booked.
- Completed: The session date has passed.
- Declined: Your center couldn't accommodate the request.
- Cancelled: The request was withdrawn (by you or your center).
The Approved and Completed tabs
Both tabs are organized by month. Use the ‹ and › arrows beside the month name to browse. The Completed tab also has a Show filter so you can view All, Completed, Declined, or Cancelled requests.
Viewing a request
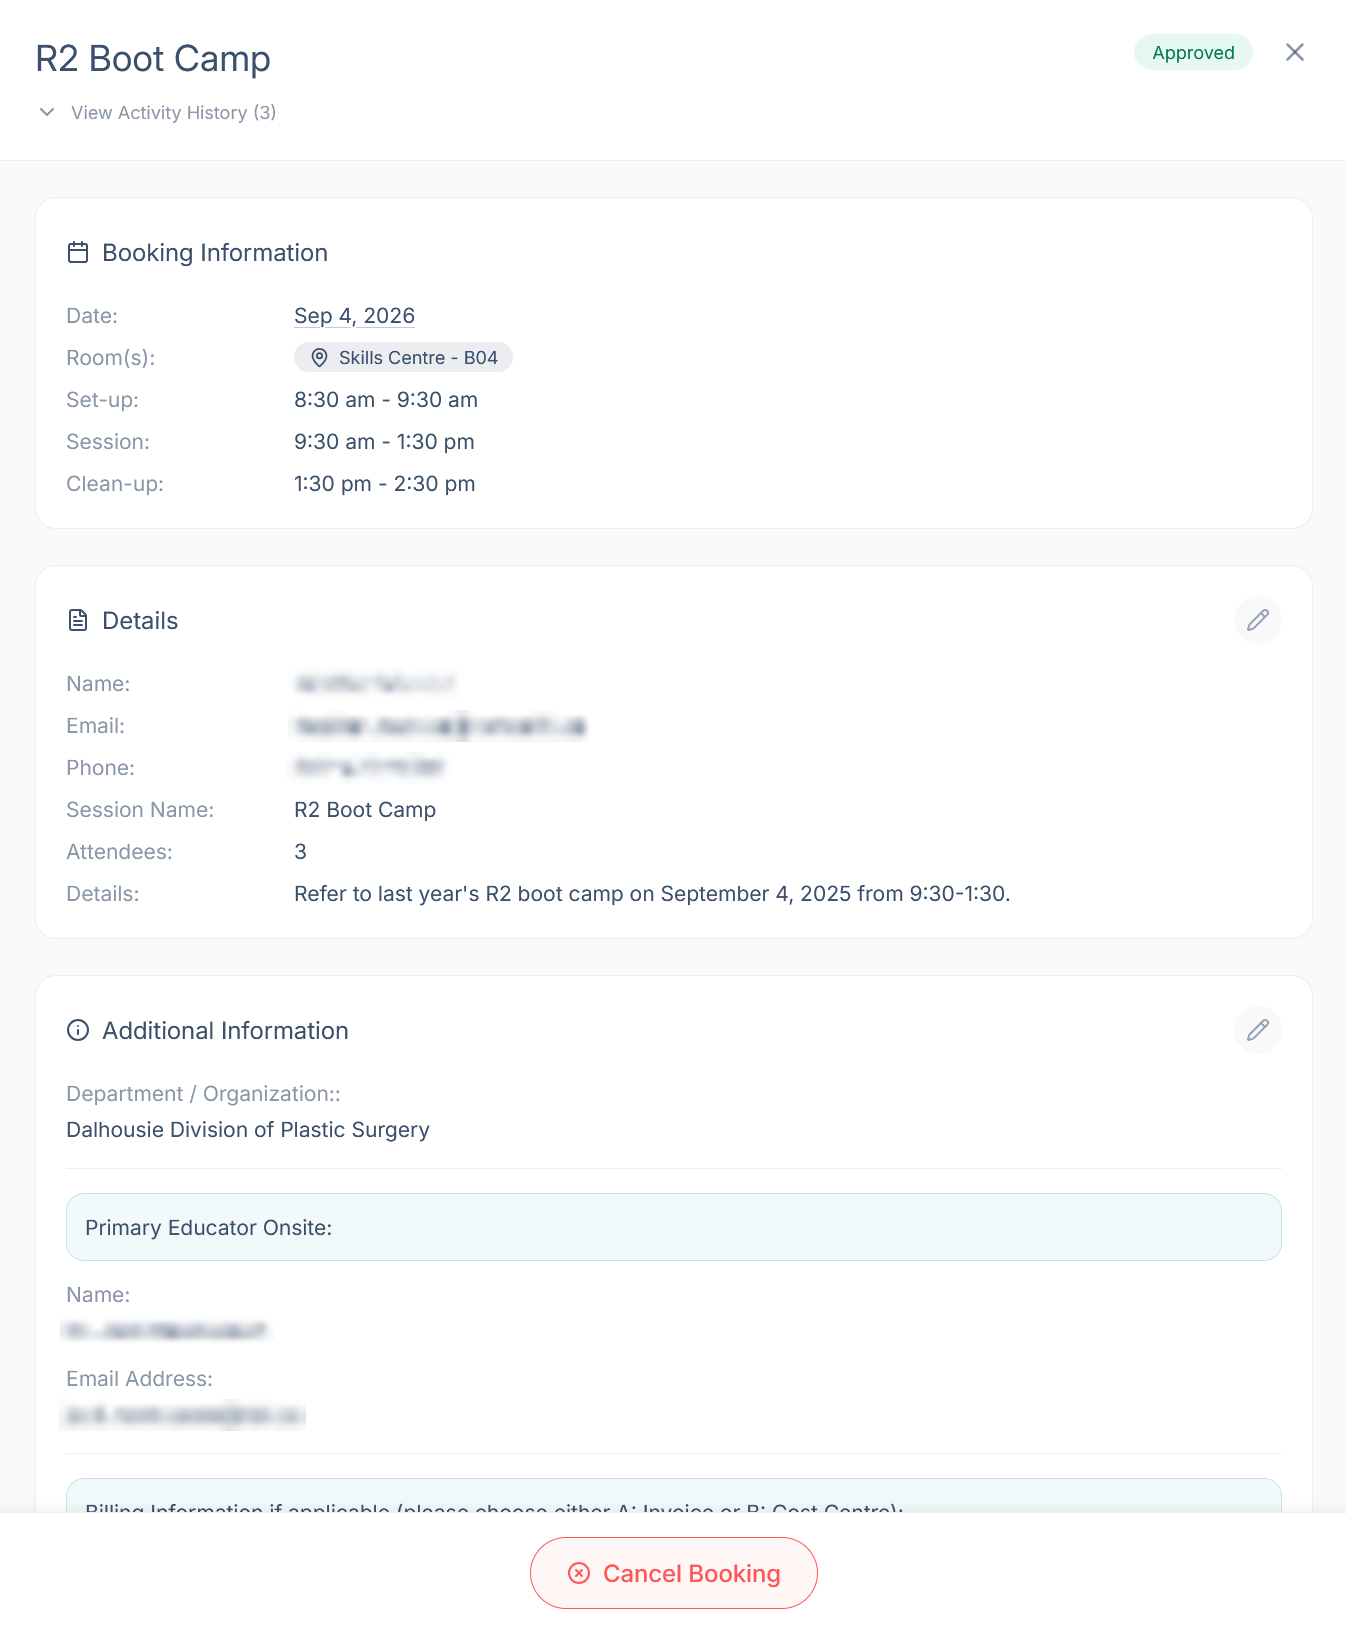
Select any request card to open its details panel. The request's current status appears as a pill beside the session name at the top of the panel, so it's the quickest way to check where a booking stands. Below that, the panel is organized into cards:
- Booking Information: the date, assigned room(s), and the time breakdown of set-up, session, and clean-up.
- Details: your contact information, the session name, attendee count, and session details.
- Additional Information: your center's custom questions.
- CC Recipients: anyone you've copied on the request. They receive all the same notification emails you do.
- Attachments: files you've added to the request, such as a scenario outline or a participant list.
- Assets: the people and equipment assigned to your session. Your center's staff assign these, so the card is read-only.
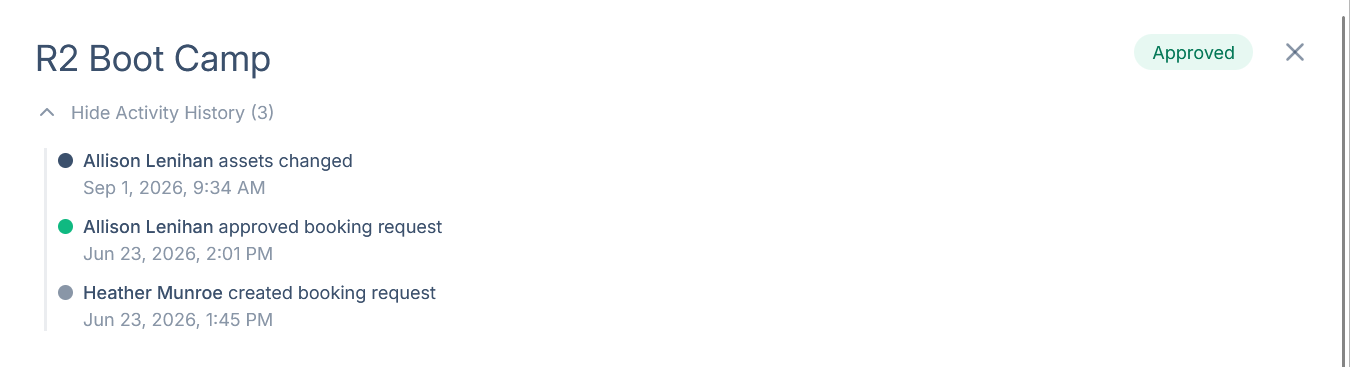
Open any request and you'll find ‘View Activity History’ directly beneath the session name at the top of the panel, with the number of entries in brackets. Select it to expand a timeline of every change to the request, whether you made it or your center's staff did. Once expanded, the same control reads ‘Hide Activity History’. Any message from your center appears beneath the relevant entry. To withdraw the request entirely, select ‘Cancel Booking’ at the bottom of the panel. Cancelling stays available right up to the session date.
Editing a request
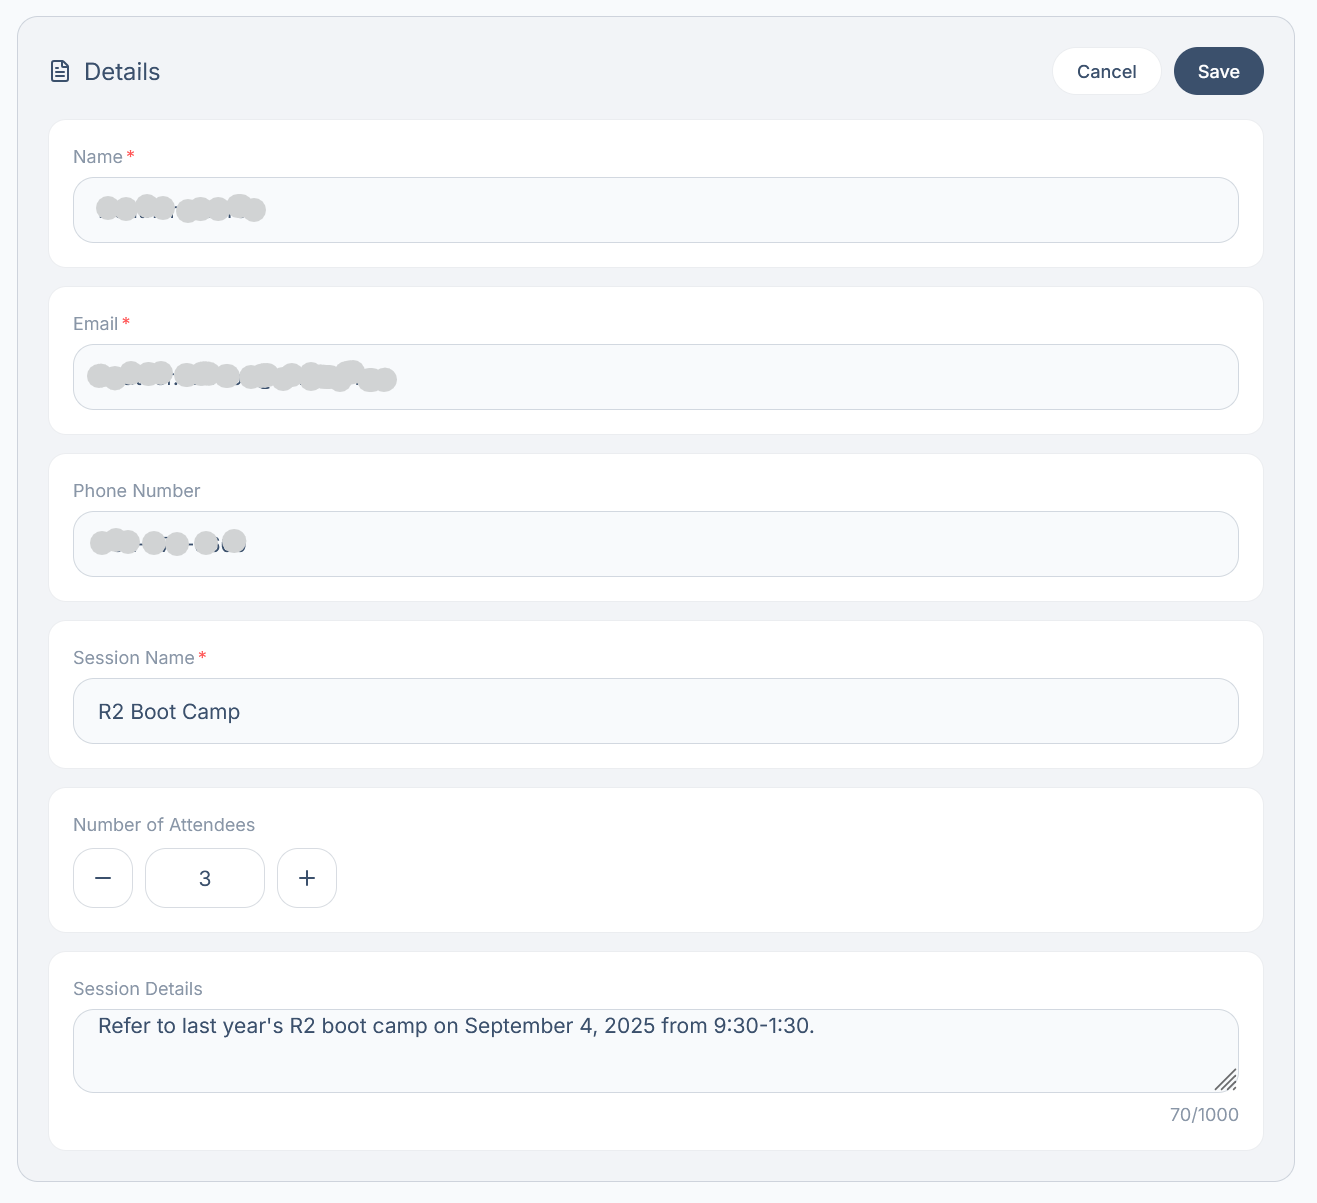
Every card except Booking Information and Assets has a pencil icon in its top-right corner. Select it to edit that card in place, then Save to keep your changes or Cancel to discard them. You can make these edits at any time, whatever the request's status. Booking information (the date, rooms, and times) can only be changed by your center's staff, so contact them if it needs updating.
- Details: update your contact information, the session name, attendee count, and session details.
- Additional Information: update your answers to your center's custom questions, if your center uses them.
- CC Recipients: add or remove the people copied on the request.
- Attachments: add a file, such as a scenario outline or participant list, or remove one you've already added.
Notifications
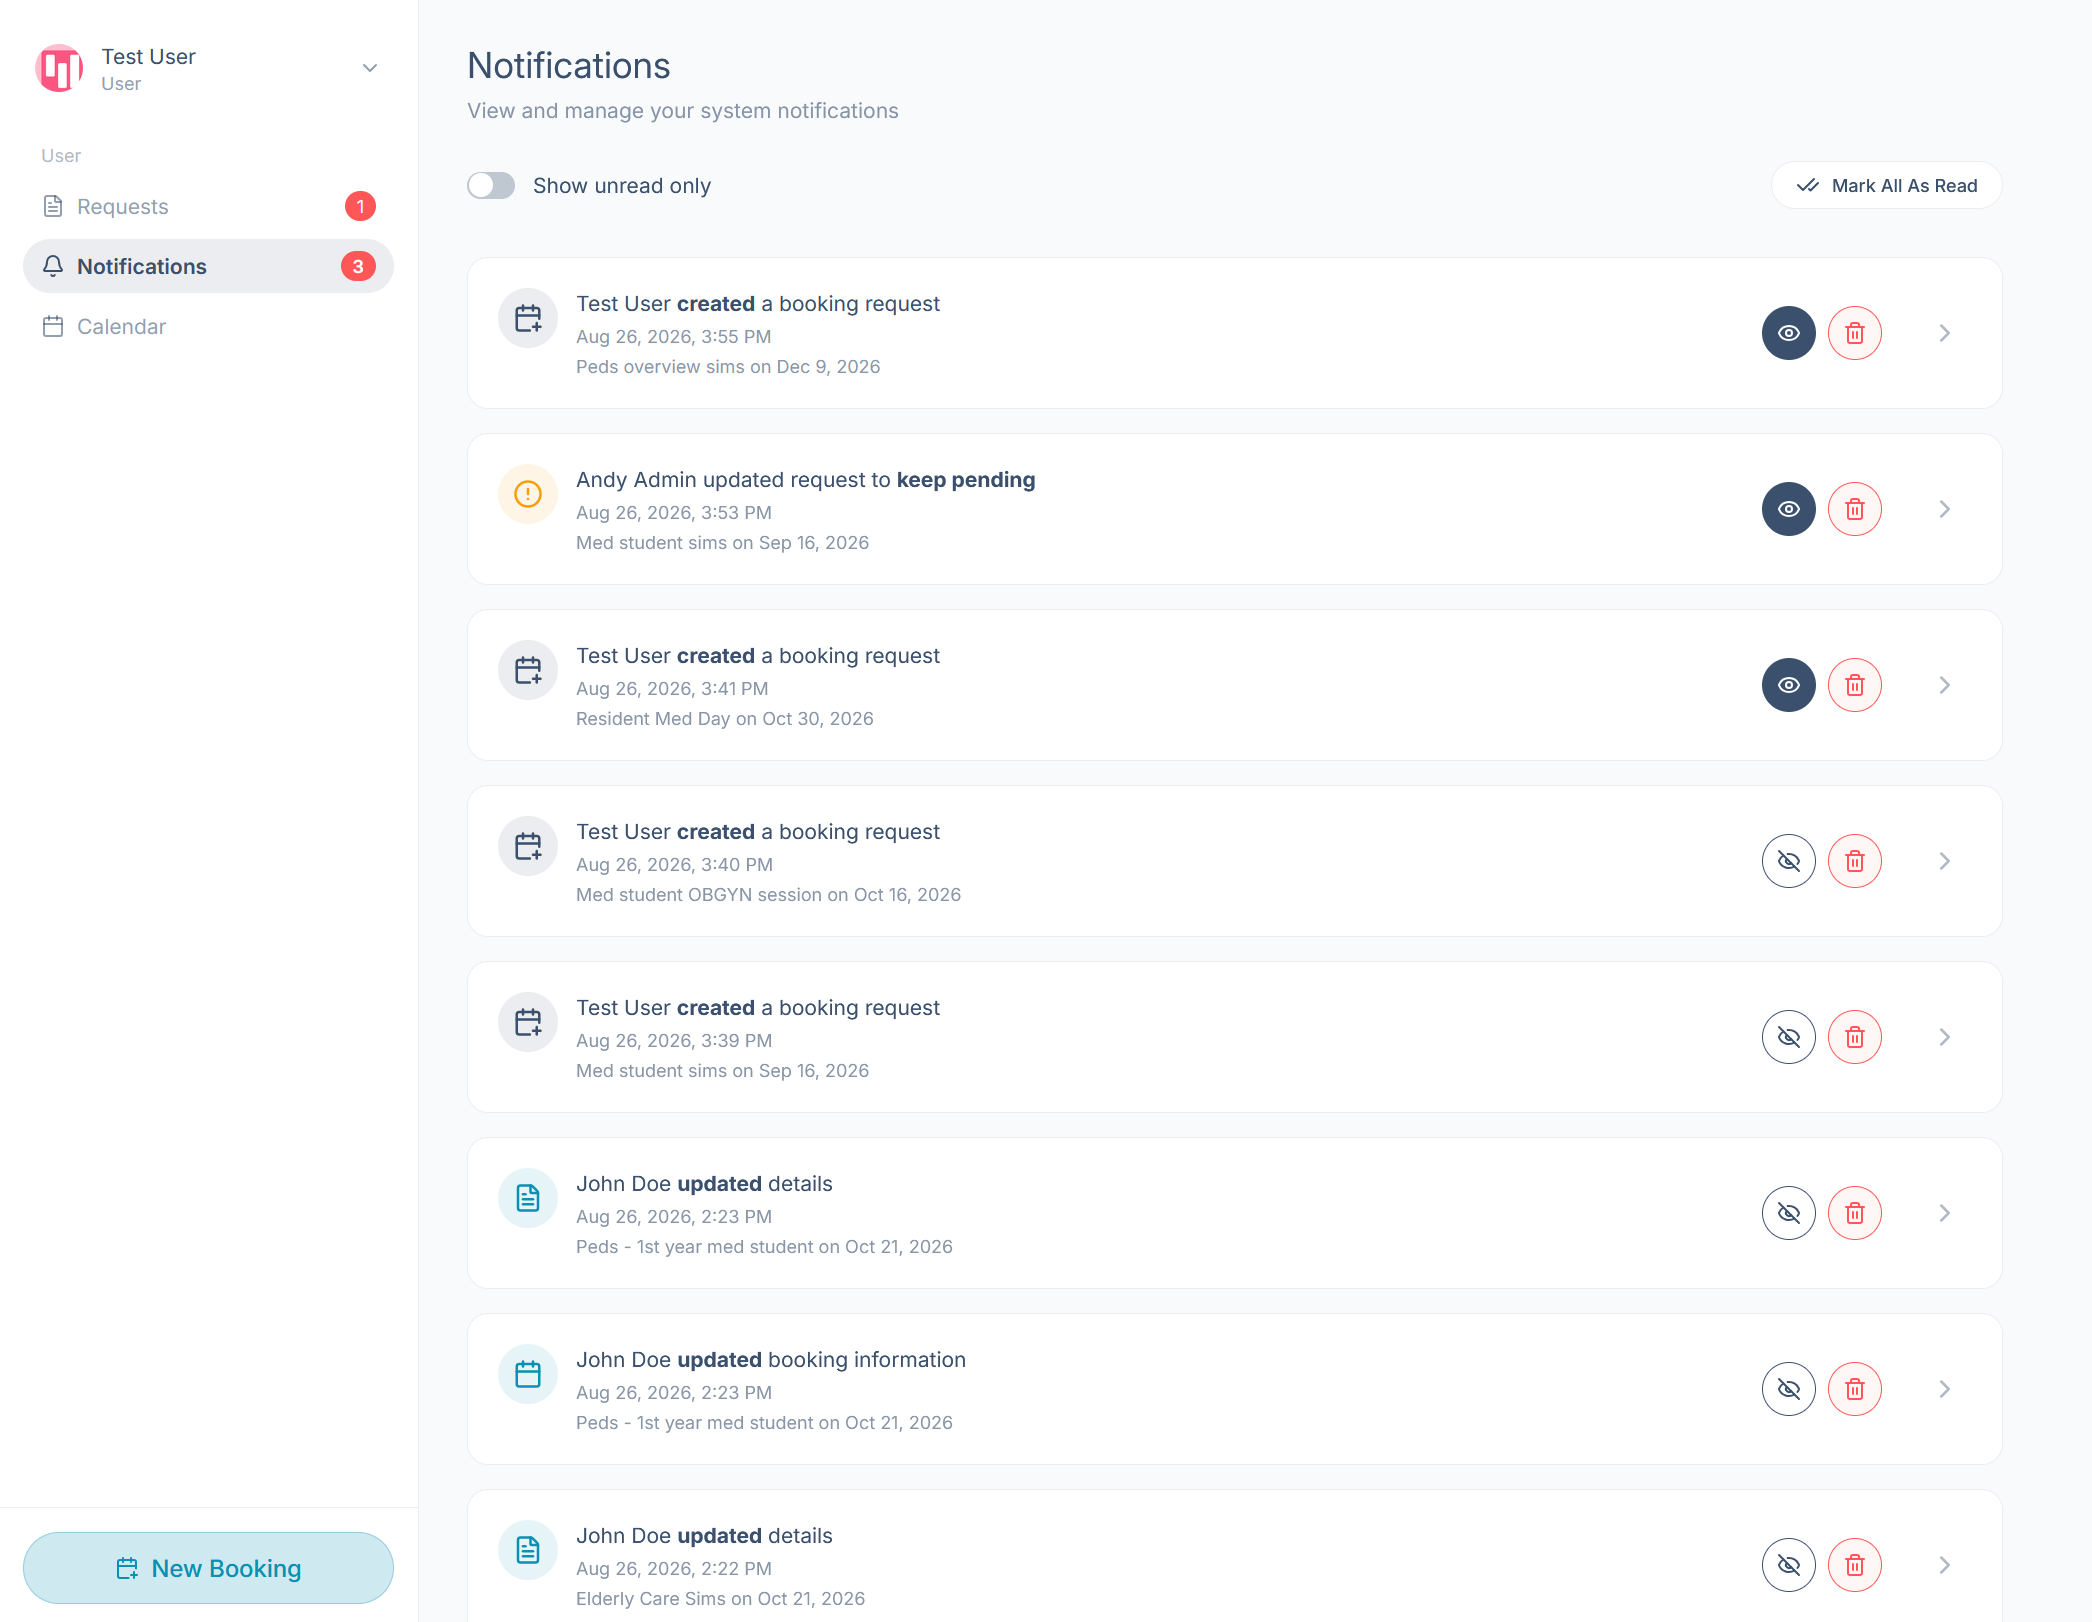
Notifications collects every update on your bookings, including booking status changes, attachments, and edits, with the newest first. Each entry shows who did what, when, and which session it relates to.
- Show unread only (top left) hides notifications you've already read.
- Mark All As Read (top right) clears the unread badge in one click.
- The eye icon toggles a single notification between read and unread. It shows solid on unread entries and crossed out once you've read them.
- The trash can icon deletes a notification.
- The › arrow opens the related booking request.